
Quick Summary
To film professional client testimonials in a noisy office, test shortlisted rooms for hum, voices and echo, choose the quietest, and use a lavalier microphone placed 15 to 20 centimetres below the client’s chin. Record a backup track and room tone, since editing cannot fully rescue poor audio.
- Test three candidate rooms with a 60-second recording, with the door closed and the air conditioning on and off.
- Glass-walled meeting rooms let in corridor conversation, so always test them with the door closed.
- A lavalier microphone sits 15 to 20 centimetres below the chin, clipped to the lapel or shirt placket.
- Always record a backup on a second recorder or lavalier, and monitor sound on closed-back headphones throughout.
- Record a few seconds of room tone before the client leaves, then aim for a testimonial of 60 to 90 seconds.
Table of Contents
- Why Noisy Offices Ruin Testimonial Footage
- Planning Your Testimonial and Writing Client Testimonial Video Questions
- Triaging Your Office: Choosing a Room and Reducing Noise
- Choosing and Placing Microphones: The Best Microphone for Interview Video
- Camera, Lighting and Helping Your Client Speak Naturally
- Running a Repeatable Audio Test, Recording Workflow and Client Testimonial Video Script
- Editing Limits and How Long Your Testimonial Should Be
- Booking Your Next Testimonial Shoot with ERS Video
- Frequently Asked Questions
Why Noisy Offices Ruin Testimonial Footage
Noisy offices are the number one reason client testimonials look great but sound awful. The camera captures the client’s face, but the ringing phones, humming air conditioning and chatter from the next desk end up on the audio track.
Most businesses film testimonials in the place where the work happens. That makes sense, because the client is busy and the office is familiar.
Watch out: Do not assume you can fix bad audio later. Editing software can reduce noise, but it cannot rebuild the words that a fan or a passing conversation has drowned out.
The good news is that most noise problems are predictable. Once you know where the sound comes from, you can plan around it before the cameras roll.
Planning Your Testimonial and Writing Client Testimonial Video Questions
Before you pick a room or a microphone, decide what the testimonial is for. A short clip for social media needs one clear result from one customer.
Good questions do most of the work when you are gathering client testimonials. Ask the client to describe their situation before they chose you, then what changed, then what they would tell a friend.
Here are a few sample questions to start with:
- What was the problem you were trying to solve?
- Why did you decide to work with us?
- What was the result, in your own words?
- Would you recommend us to someone in your position, and why?
Send the questions to your client a few days ahead. Clients who have time to think give clearer answers and feel less nervous on the day.
For a fuller guide to shaping your questions and script, see Perfect Script. If you want to get the planning right from the start, Professional Brand Video Production Tips covers more of the groundwork.
Triaging Your Office: Choosing a Room and Reducing Noise
Walk through the office at the time you plan to film, not at a quiet hour.
A practical triage method, in order:
- Shortlist three rooms. A small meeting room with a solid door, an enclosed office, and a soft-furnished breakout space are typical candidates. Avoid open-plan desks, reception areas and anywhere with a hard floor and glass on two sides.
- Test each room with a 60-second recording. Use your phone or a recorder, stand where the client will sit, and record silence with the door closed. Play it back on headphones and listen for hum, hiss, distant voices and echo. Repeat with the air conditioning on and off.
- Score each room on three factors: steady noise (fans, HVAC, electrical hum), intermittent noise (phones, conversations, lifts), and echo (hard surfaces bouncing sound). A room that scores well on all three is your primary; the next best is your backup.
- Decide when to relocate. If the best room still has audible conversation through the wall or a constant hum you cannot switch off, move the shoot to a quieter part of the building, a client’s own office, or a booked meeting room away from the main floor. Relocating is often a better use of time than rescuing poor audio in the edit.
Once you have chosen the room, reduce noise at the source. Ask colleagues to keep phones and conversations out of the area, switch off nearby fans and notifications, and put a “filming in progress” sign on the door.
Watch out: glass-walled meeting rooms are the most common trap in modern offices, they look private but let in every conversation from the corridor, so always test with the door closed and listen for voices from outside.
For a fuller guide to shaping your questions and script once the room is set, see Perfect Script. If you want to get the planning right from the start, Professional Brand Video Production Tips covers more of the groundwork.
Choosing and Placing Microphones: The Best Microphone for Interview Video
The microphone matters more than the camera for a testimonial. Viewers will forgive a slightly soft image, but they will leave quickly if the audio is thin or full of hiss.
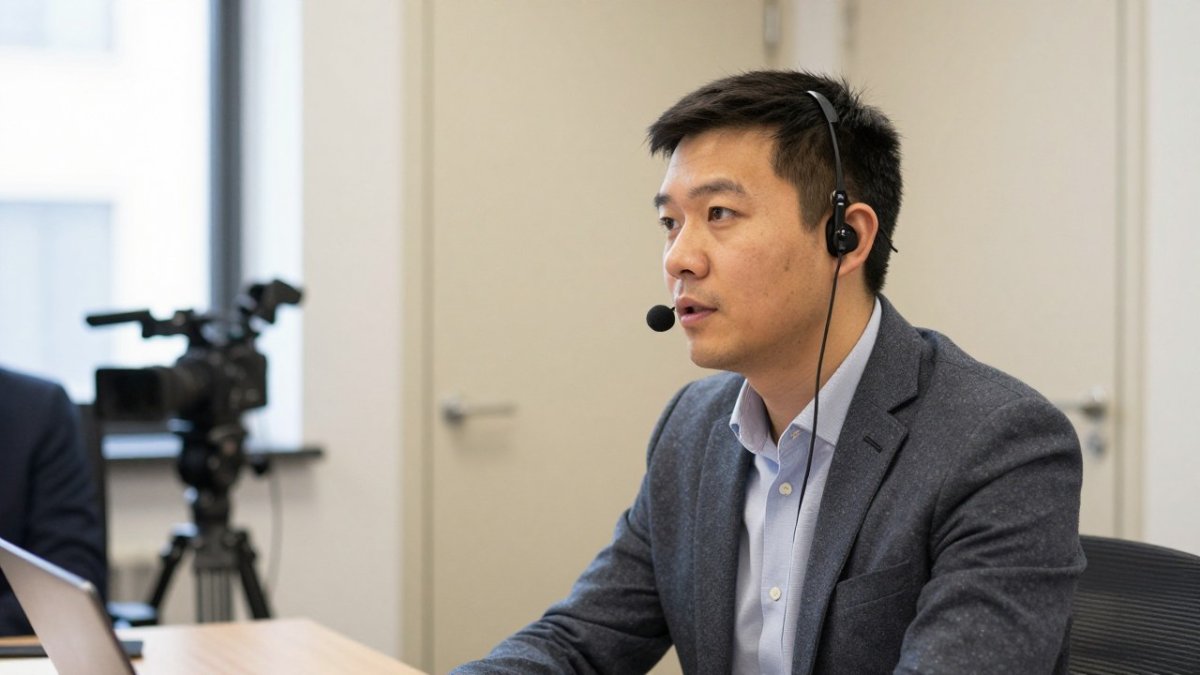
There are three practical options for a client testimonial, and each has a clear trade-off in a noisy room:
- Lavalier (clip-on) microphone. This is the default for most office interviews. It sits 15 to 20 centimetres below the chin, clipped to the lapel or shirt placket, so it picks up the client’s voice far more than the room. The trade-off is clothing rustle and cable handling, so route the cable inside the shirt or under a jacket and use a small loop of slack taped to the fabric. A lavalier is the best choice when the client will be seated and relatively still.
- Handheld microphone. Useful when the client is standing, moving around a workspace, or when you want a visibly professional setup. Hold it 10 to 15 centimetres from the mouth and keep it slightly off-axis to reduce plosives. The trade-off is that hand and arm movement creates handling noise, and the client may feel more self-conscious holding a microphone.
- Boom or shotgun microphone. Best for capturing a more natural, cinematic sound when the client is seated and the room is reasonably controlled. Position it just out of frame, 30 to 45 centimetres above and slightly in front of the client, angled down towards the mouth. In a noisy office, a boom picks up more of the room than a lavalier, so treat it as a secondary option rather than the primary one.
Whichever you choose, always record a backup. Use a second recorder or a second lavalier on a separate track, and monitor the sound with closed-back headphones throughout the shoot.
A common pattern is to clip the lavalier to the side of the chest facing the camera, then run a short test where the client turns their head left and right and reads a sentence aloud.
For more detail on specific microphones and the kit that keeps shoots organised, see Which Video Production Project Management Tools Are Worth It? in our related guides.
The three microphone options each trade off differently in a noisy office, as summarised below.
| Option | Best for | Key trade-off |
|---|---|---|
| Lavalier (clip-on) | Seated, relatively still clients | Clothing rustle and cable handling |
| Handheld | Standing or moving clients | Handling noise and client self-consciousness |
| Boom or shotgun | Seated clients in a controlled room | Picks up more of the room |
| Lavalier placement | 15 to 20 cm below the chin | Clip to lapel or shirt placket |
| Handheld placement | 10 to 15 cm from the mouth | Keep slightly off-axis to reduce plosives |
| Boom placement | 30 to 45 cm above, angled down | Position just out of frame |
Camera, Lighting and Helping Your Client Speak Naturally
Place the camera at the client’s eye level and frame them from the chest up. Leave a little space in front of them so the frame feels open. Keep the background simple, with no bright windows or busy posters behind their head.
Light the client from the front or slightly to one side. A soft light source, such as a window with a diffuser or a small panel, makes skin look natural. Avoid harsh overhead lights, which create shadows under the eyes.
Clients often freeze on camera. Start with a few easy questions about their role or their day. Let them talk without the camera running, then begin recording.
A relaxed client gives better soundbites. Say the question once, then wait. Silence is fine, and it often leads to a fuller answer.
Running a Repeatable Audio Test, Recording Workflow and Client Testimonial Video Script
Before the client arrives, run a short audio test in the chosen room. Record 30 seconds of the room with the air conditioning on and off. Play it back on headphones and listen for hums, clicks or distant voices.
Follow the same steps every time you film:
- Choose the room and turn off noisy equipment.
- Set the microphone levels and record a test clip.
- Check the audio on headphones for hiss, hum and clipping.
- Confirm the camera framing and lighting.
- Record the client, then record a short room tone clip of silence.
- Review the footage before the client leaves.
Room tone, a few seconds of the empty room, helps editors smooth out background noise later. Keep it for every shoot.
Turn your questions into a simple script. Write the main points in bullet form rather than full sentences, so the client’s answers still sound natural.
Editing Limits and How Long Your Testimonial Should Be
Post-production noise reduction helps, but it has limits. Good tools can remove steady hums and fan noise. They struggle with voices, clattering keyboards and sudden bangs. Heavy processing can also make a voice sound thin or robotic.
Plan for a few minutes of tidying, not a rescue. If the original audio is poor, the best fix is usually to reshoot in a better room.
A testimonial between 60 and 90 seconds works well for most websites and social channels. Longer films suit detailed case studies. Cut away long pauses and repeated points, but keep the client’s own words where possible, since they sound more believable than a script.
Booking Your Next Testimonial Shoot with ERS Video
If you want a testimonial shot properly without managing the noise yourself, ERS Video can help. We can help with the questions, the room, the audio and the lighting, then edit the footage into a professional film.
Pricing depends on the length of the film, the number of locations, the shoot date and how much editing is needed, so the best next step is to ask for a quote from ERS Video’s website. Hiring Professional Videographers In Hertfordshire explains how we work with local businesses.
BUTTON: Plan Your Testimonial Shoot
CARD_TITLE: Ready to film a testimonial that sounds as good as it looks?
CARD_TEXT: ERS Video plans, films and edits client testimonials with clean audio and professional lighting.
Frequently Asked Questions
How do you record clear audio in a noisy office?
Choose the quietest room you can, ideally a meeting room with a closed door, and switch off air conditioning, phones and nearby equipment during filming. Position a lavalier microphone close to the client’s chest, and wear headphones to monitor sound live. Record a short room-tone sample before you start so an editor has clean ambient audio to work with. Always capture backup audio on a separate recorder, because a single recording device failing can ruin an afternoon of filming.
What microphone is best for filming a client testimonial indoors?
For most noisy offices, a lavalier microphone clipped to the client’s clothing gives the cleanest speech because it sits close to the mouth and rejects distant noise. A handheld or shotgun microphone can work if you keep it within arm’s length and out of frame. Pricing for equipment varies by model, so check specifications and current prices with suppliers before buying. Whichever you choose, test it in the actual room before the interview starts.
How long should a client testimonial video be?
Most testimonial videos work best between 60 and 90 seconds for social media and website use, with a longer cut of two to three minutes available for sales conversations. Edit the client’s answers down to their strongest soundbites, and keep each clip focused on one point. Shorter cuts hold attention on mobile screens, while longer versions suit prospects who want more detail. Your final length depends on where the video will be published.
Can background noise be removed from a testimonial video in editing?
Editing software can reduce steady sounds such as fans, hums and traffic, but it cannot fully separate a voice from overlapping conversation or sudden noises. Heavy processing often makes speech sound thin or artificial. Treat post-production noise reduction as a rescue step rather than a replacement for good location choice and microphone placement. Recording clean audio at the start is always more reliable than fixing it afterwards.
